Integrate Intercom Chat into the Cirilla app to enable customers to ask questions and inquire about pre-sale matters.
Features
- Show chat icon on floating action screen (preview)
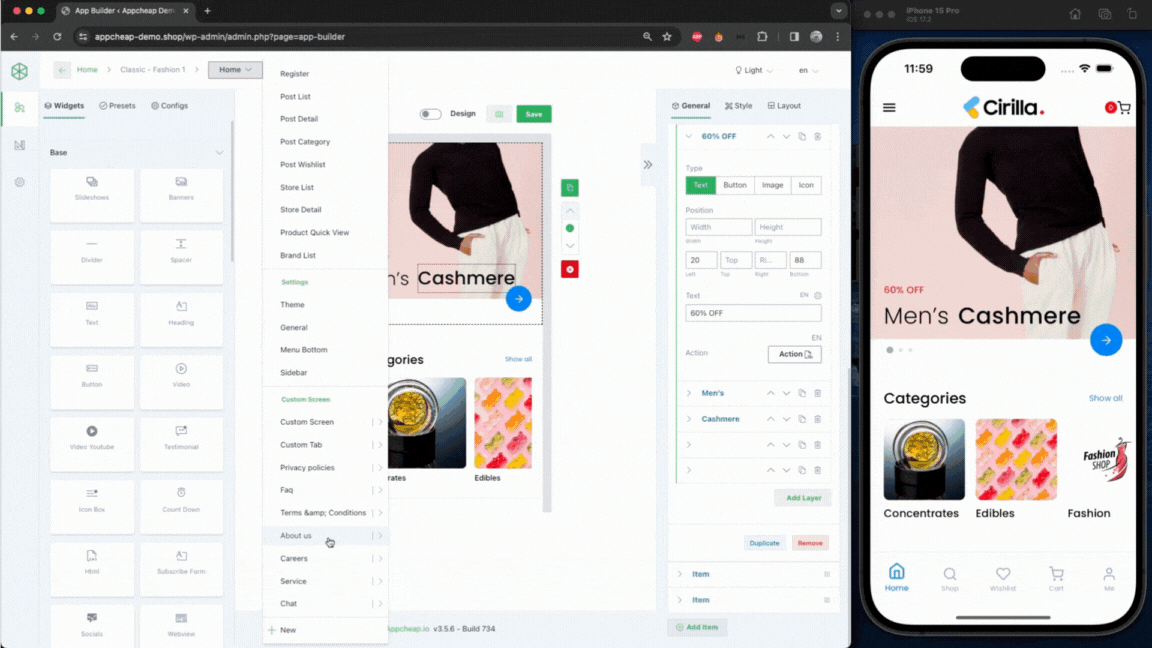
- Display chat conversation with App builder action (preview)
- Open chat conversation with init message content (preview)
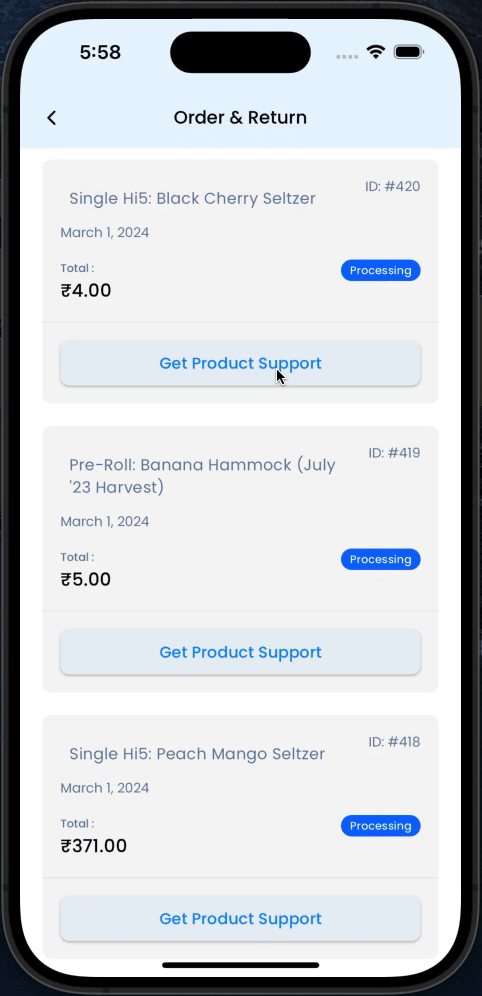
- Chat Support Order (preview)
- Receive the notifications (preview)
Requirement
- Cirilla
v3.9.0or above - Uses Intercom Android SDK Version
15.6.3. - The minimum Android SDK
minSdkrequired is21. - The compile Android SDK
compileSdkrequired is34. - Uses Intercom
iOS SDKVersion16.5.9. - The minimum
iOStarget version required is13. - The
Xcodeversion required is15.
Getting started
– Create an Intercom account to use Intercom services: https://www.intercom.com/
Install Package
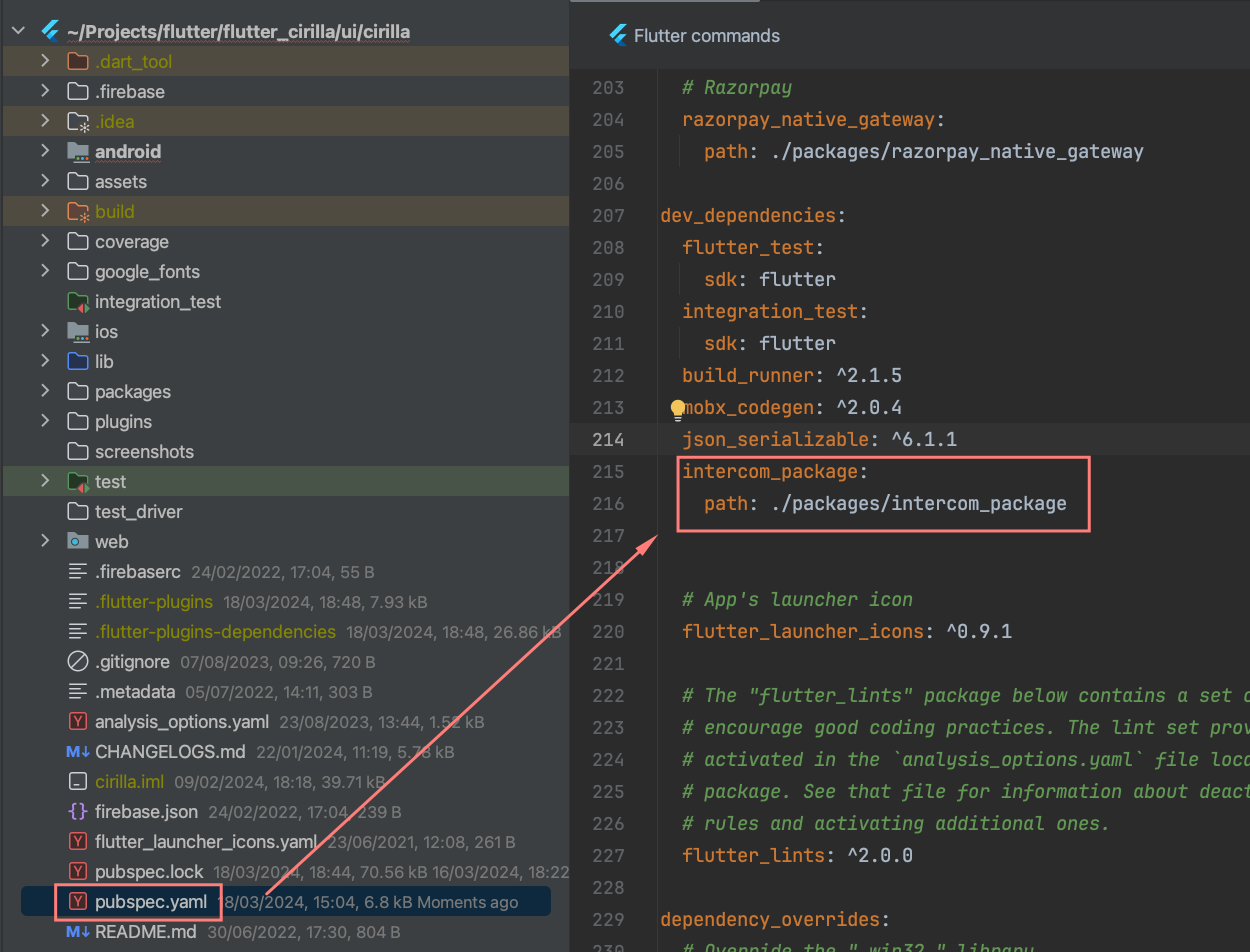
- Copy intercom_package package and add to packages folder in cirilla project.
- Import package in
cirilla/pubspec.yaml
Example:
  intercom_package:
    path: ./packages/intercom_package
Then run flutter pub get in your project
Configuration Cirilla App
Android
Open file: cirilla/android/app/src/main/AndroidManifest.xml
<uses-permission android:name="android.permission.VIBRATE"/>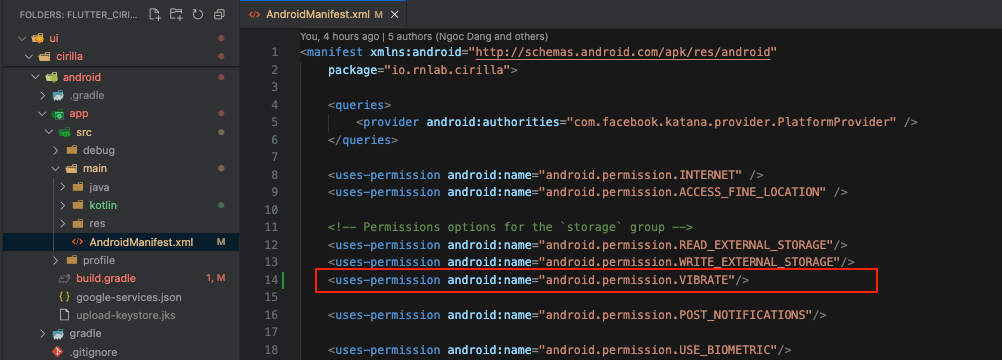
Setup custom application class
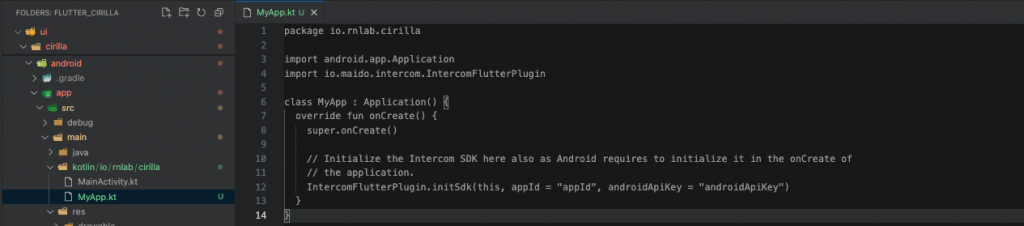
- Create a custom
android.app.Applicationclass namedMyApp.kt - Open folder:
cirilla/android/app/src/main/kotlin/io/rnlab/cirilla - Add an
onCreate()override. The class should look like this:
package io.rnlab.cirilla
import android.app.Application
import io.maido.intercom.IntercomFlutterPlugin
class MyApp : Application() {
  override fun onCreate() {
    super.onCreate()
    // Initialize the Intercom SDK here also as Android requires to initialize it in the onCreate of
    // the application.
    IntercomFlutterPlugin.initSdk(this, appId = "appId", androidApiKey = "androidApiKey")
  }
}
Note: Change appId and androidApiKey to your Intercom key
Open your AndroidManifest.xml and find the application tag. In it, add an android:name attribute, and set the value to your class’ name, prefixed by a dot (.).
android:name=".MyApp"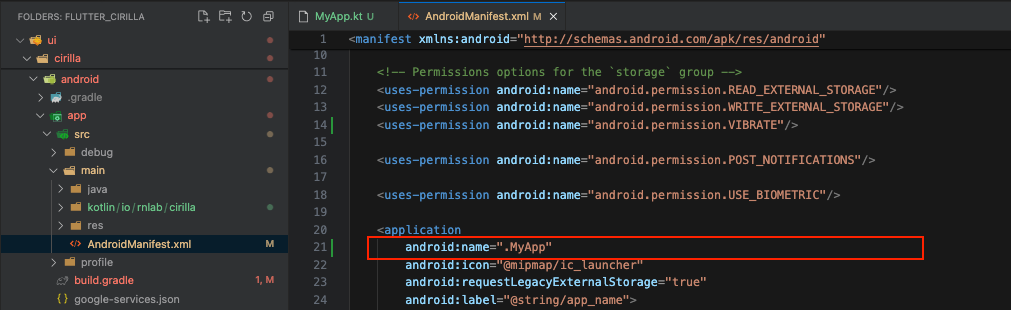
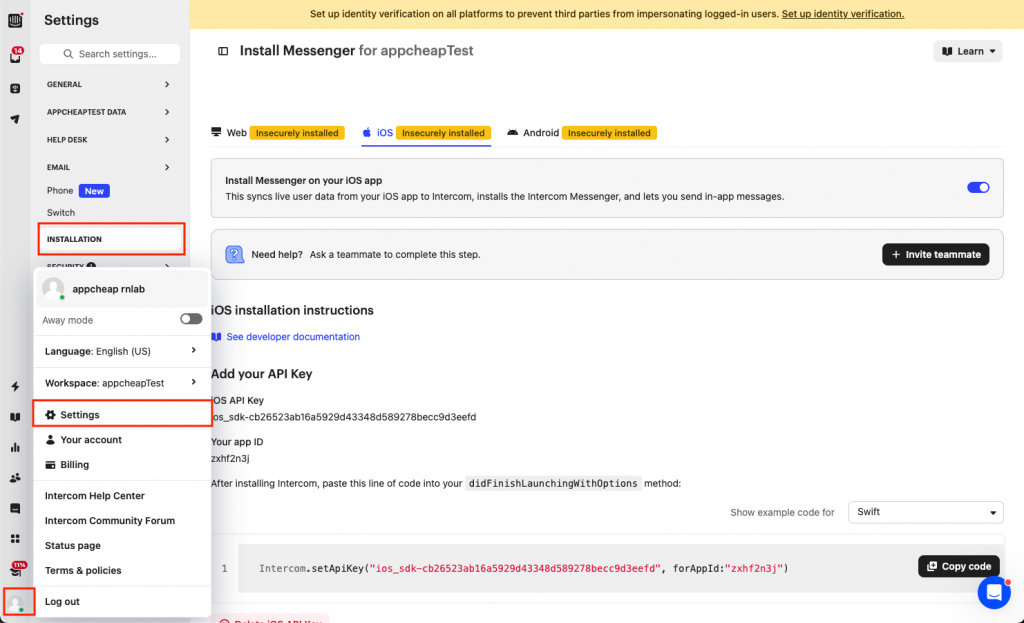
Intercom Initialization
Get the key on the Intercom Dashboard
Step 1: Install Messenger “optional: You can skip this step. If you have Installed Messenger”
Step 2: Get the key in Profile/settings/installation (preview)
Source Code
Open file: cirilla/lib/main.dart
Import package:
import 'package:intercom_package/intercom_package.dart';Add the code snippets to the main function:
intercomInitialize('appId', androidApiKey: 'androidApiKey', iosApiKey: 'iosApiKey');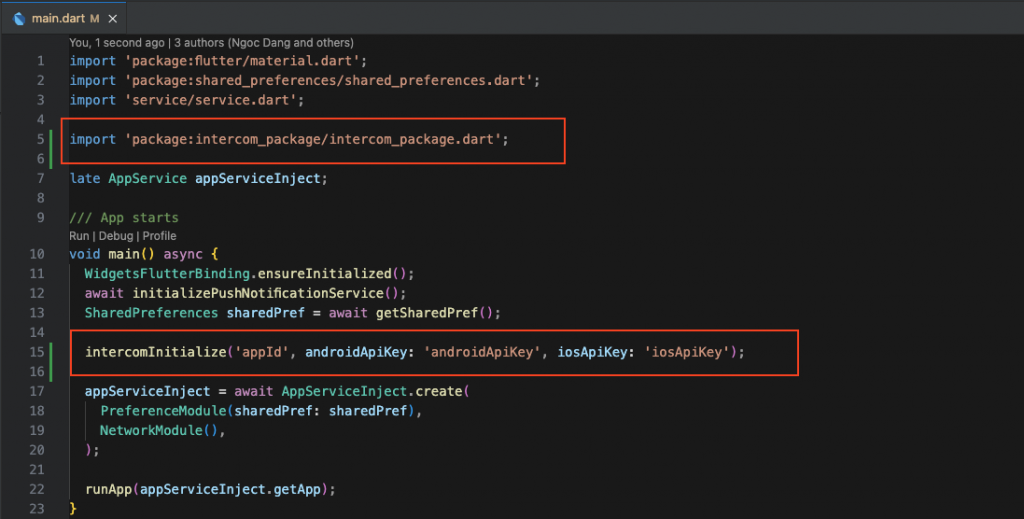
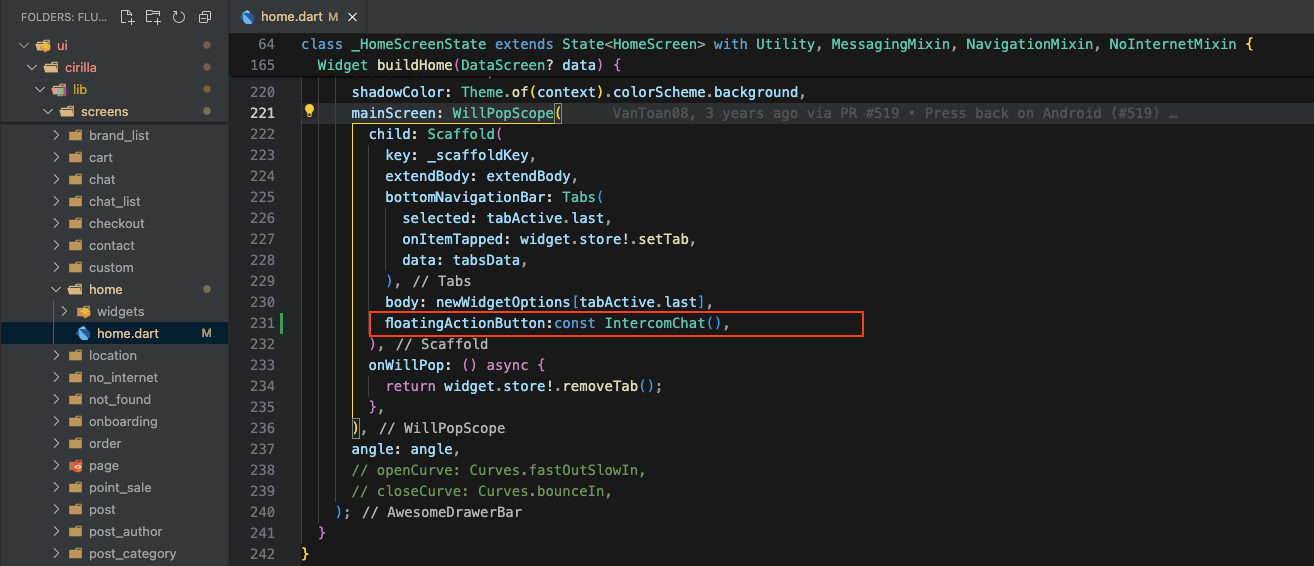
Show chat icon on floating action screen
Open a screen and find Scaffold widget then add floatingActionButton
Open file: cirilla/lib/screens/home/home.dart “example on the home screen”
Note: import 'package:intercom_package/intercom_package.dart'; when you add IntercomChat() widget
Display chat conversation with App builder action
Source Code
Open file: cirilla/lib/register_actions.dart
Import package:
import 'package:intercom_package/intercom_package.dart';Add the code snippets to the registerActions function:
  if (route == '/intercom') {
    await intercomInstance.displayMessenger();
    return 'none';
  }
App builder
Create an action in App builder plugin to display chat docs
In the advanced tab add the route: /intercom
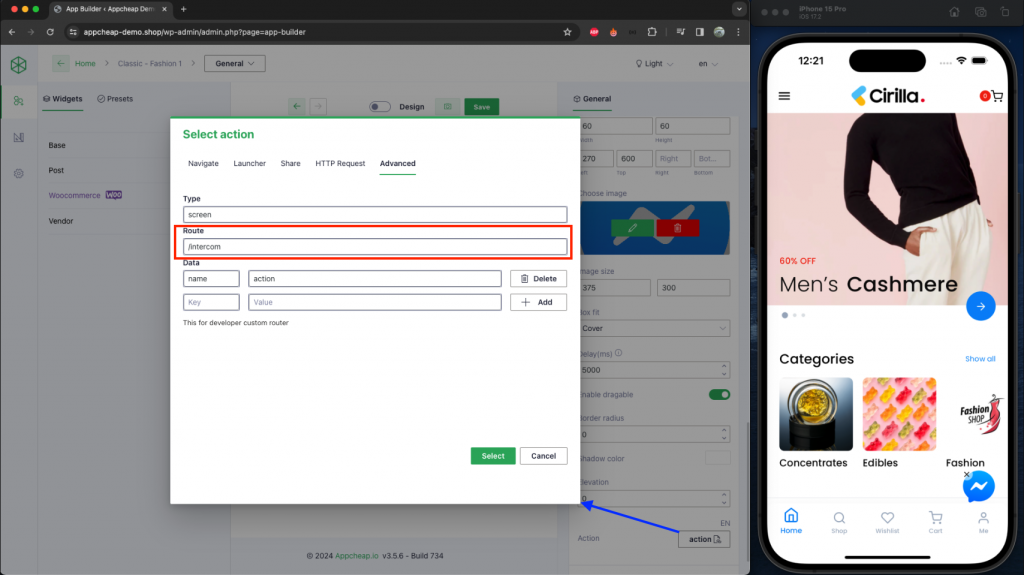
Open chat conversation with init message content
Note: import 'package:intercom_package/intercom_package.dart';
await intercomInstance.displayMessageComposer('Hello Everybody!!!');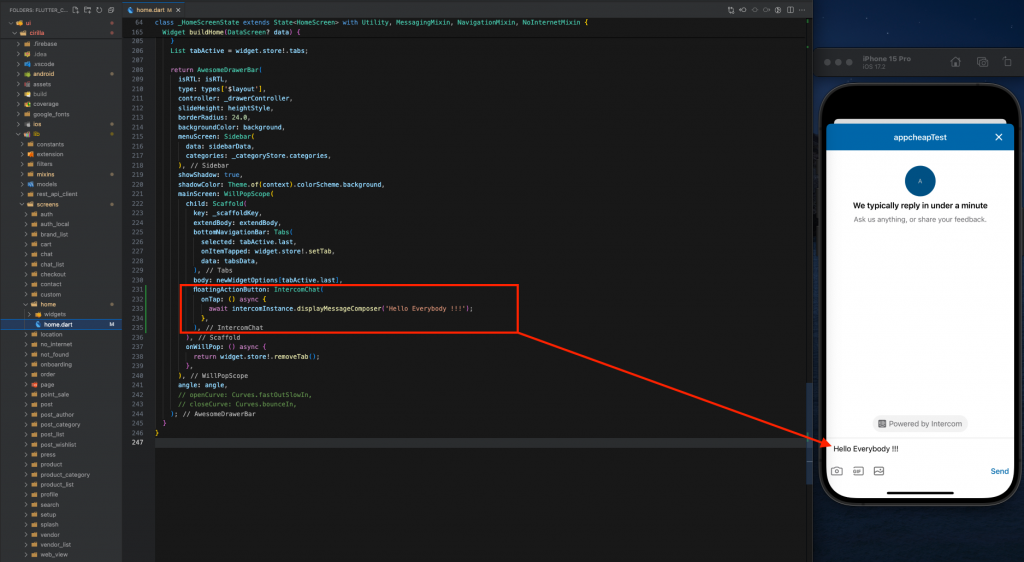
Receive the notifications
Step 1: Add server key “optional: You can skip this step. If you have configured notifications”
Step 2: open file cirilla/lib/service/messaging.dart
Import package:
import 'package:intercom_package/intercom_package.dart';Add the code snippets to the updateTokenToDatabase function:
await intercomInstance.sendTokenToIntercom(token!);
Chat Support Order
Open file: cirilla/lib/register_order_actions.dart
Import package:
import 'screens/order/widgets/order_actions_button.dart';
import 'package:intercom_package/intercom_package.dart';
Add the code snippets to the registerOrderActions function:
    ActionButton(
      titleText: 'Get Product Support',
      onPressed: (_) async {
        await displayMessageForOrderPrePopulated(data:data);
      },
    ),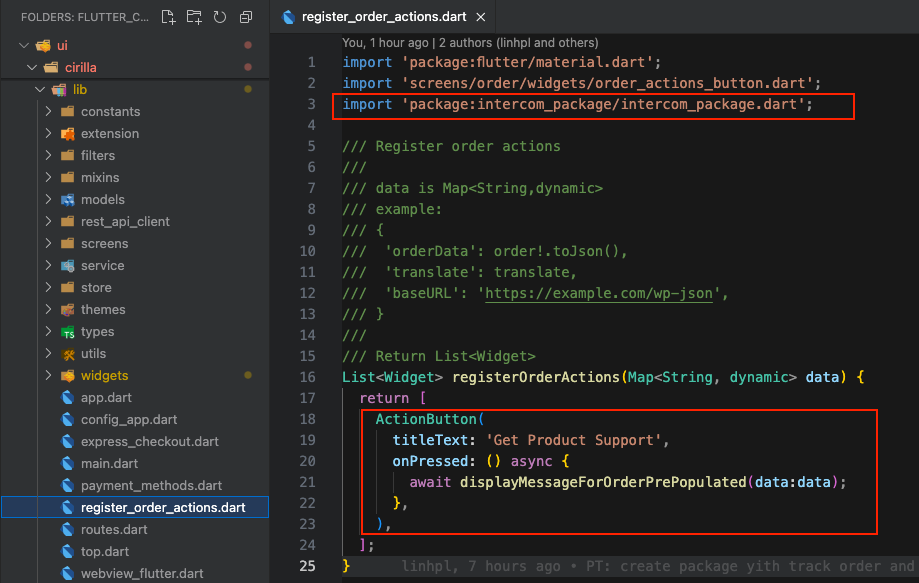