1. Update source code
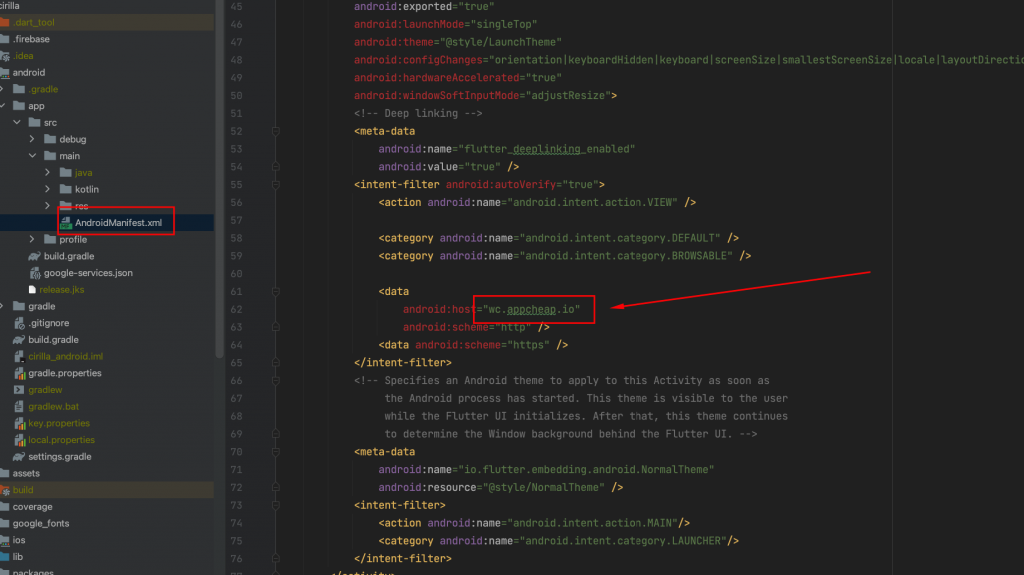
Open file cirilla/android/app/src/main/AndroidManifest.xml
Change the wc.appcheap.io to your domain

If you want restrict the path for depth link you can add android:pathPrefix

2. Add ” assetlinks.json ” on your Web server
assetlinks.json
The hosted file should look similar to this:
[
  {
    "relation": ["delegate_permission/common.handle_all_urls"],
    "target": {
      "namespace": "android_app",
      "package_name": "io.rnlab.cirilla",
      "sha256_cert_fingerprints":
        ["0F:F3:CC:46:06:1F:DF:1D:37:37:4C:DB:62:BA:94:4A:28:18:AC:B3:B3:FF:89:2F:DD:B4:33:C5:2A:20:8D:B6"]
    }
  }
]
Example: https://wc.appcheap.io/.well-known/assetlinks.json
- Set the
package_namevalue to your Android application ID setting in this step - Set sha256_cert_fingerprints to the value (Get fingerprint from Google play console here, from singing file here)
- Host the file at a URL that resembles the following:
<webdomain>/.well-known/assetlinks.json - Verify that your browser can access this file.
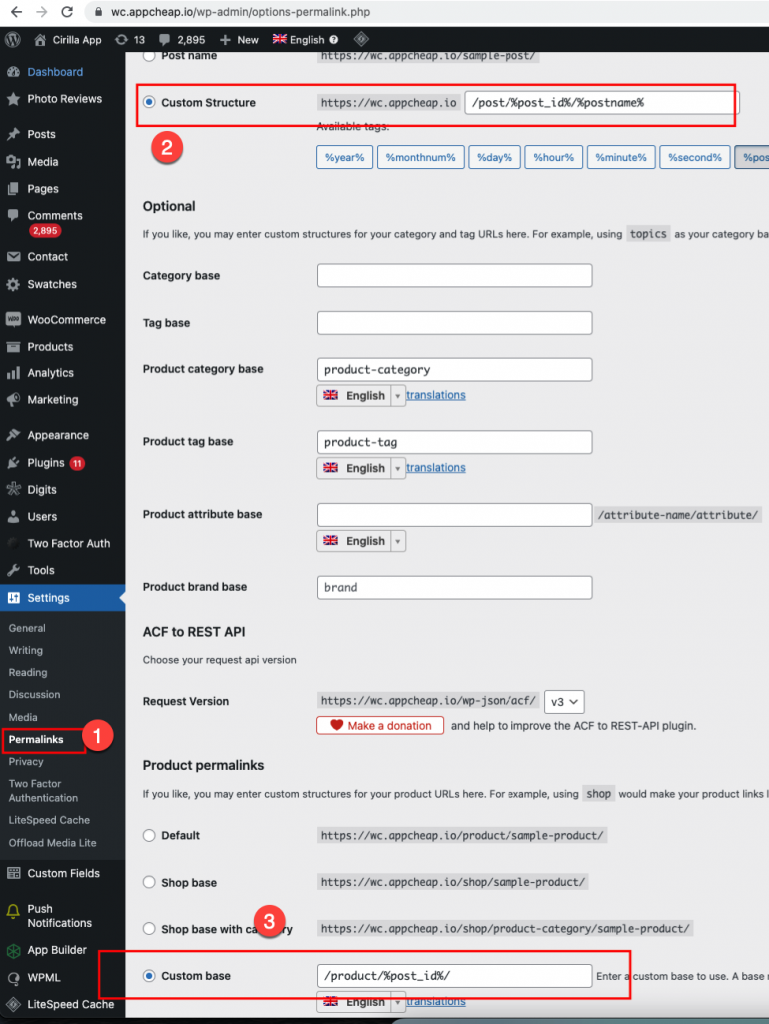
3. Permalink Settings

Common Settings
Choose Custom Structure and update the value /post/%post_id%/%postname% to input
Product permalinks
Choose Custom Base and update the value /product/%post_id%/ to input
Then the URLs website should be like this:


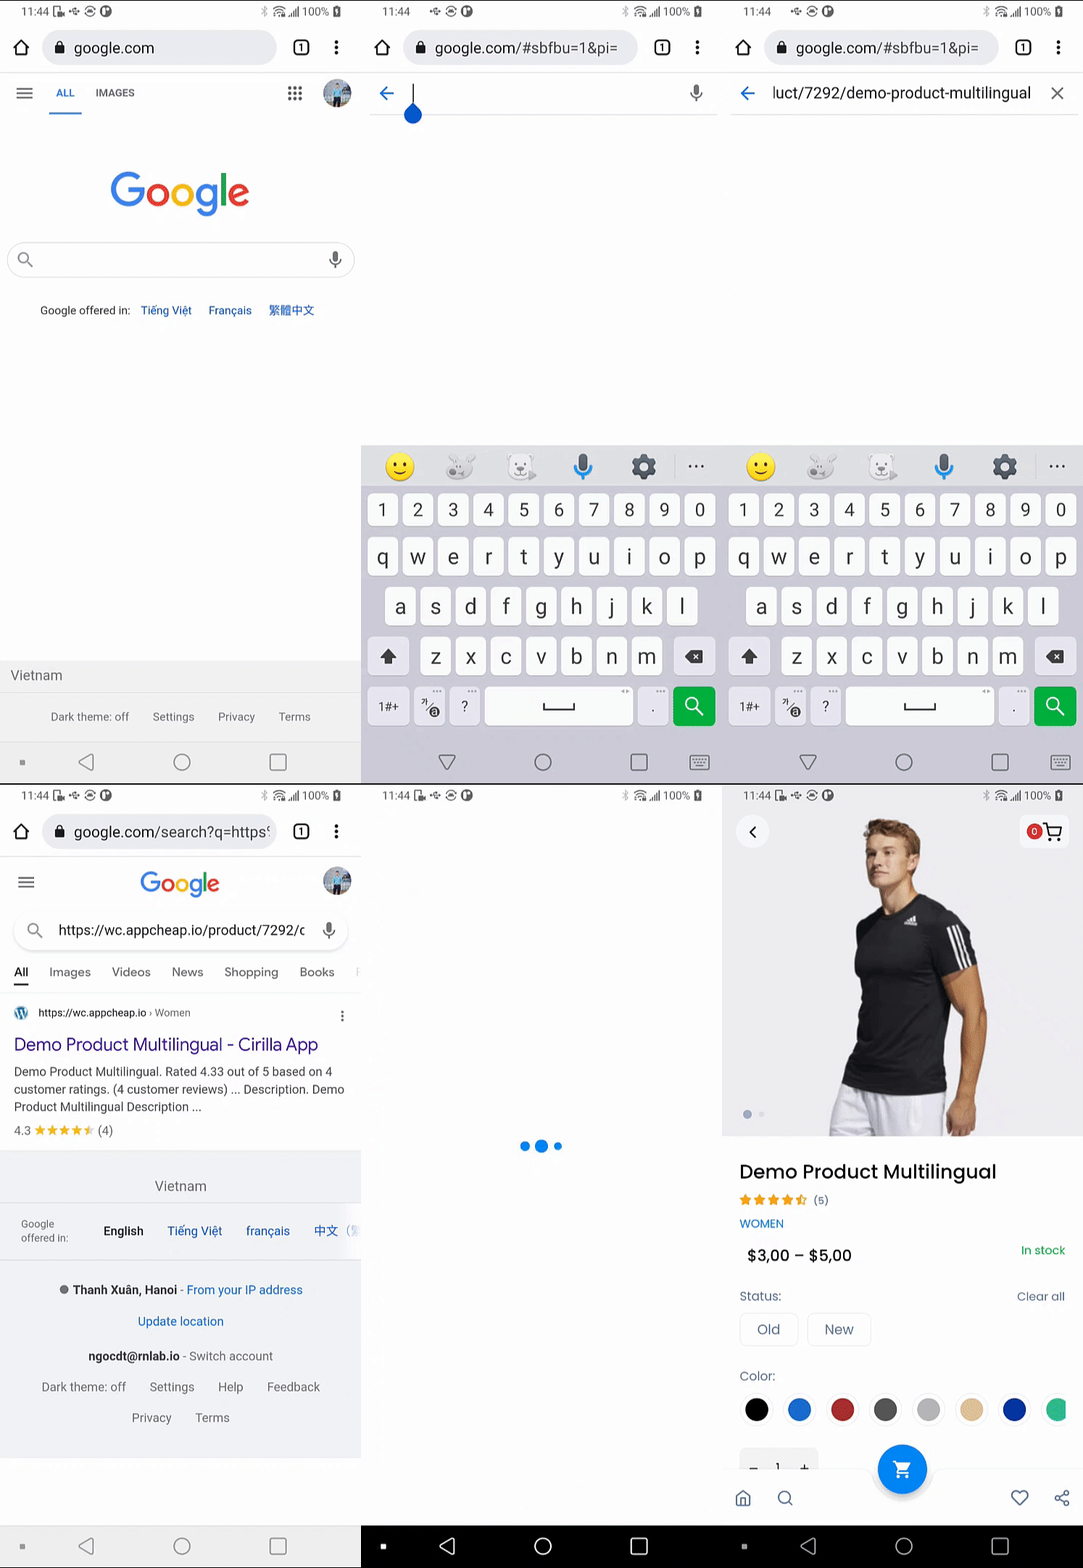
4. Results

Open tab
List key
- screens_cart
- screens_home
- screens_profile
- screens_category
- screens_vendorList
- screens_wishlist
- screens_postWishlist
- screens_postCategory
https://domain/opentab?key=screens_cartApart from the default screens tab, you can also navigate to the tab screens that you have created in the app builder.