The app is based on the Flutter framework so if you are familiar with Flutter you can run it any way you like.
Run with Android Studio
- Open
flutter_store_managerin Android Studio - Locate the main Android Studio toolbar:
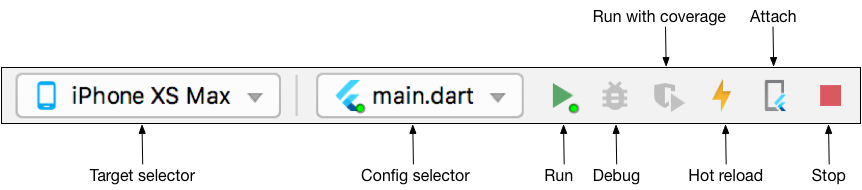
- In the target selector, select an Android device for running the app. If none are listed as available, select Tools > AVD Manager and create one there. For details, see Managing AVDs.
- Click the run icon in the toolbar, or invoke the menu item Run > Run.
Run with Command Line
1. NAVIGATE THE TERMINAL TO flutter_store_manager FOLDER
2. INSTALL DEPENDENCIES
flutter pub get3. CHECK THAT AN ANDROID DEVICE IS RUNNING. IF NONE ARE SHOWN, FOLLOW THE DEVICE-SPECIFIC INSTRUCTIONS ON THE INSTALL PAGE FOR YOUR OS.
flutter devicesIf no Android devices are connected you can check this open one emulator: https://developer.android.com/studio/run/emulator-commandline
4. RUN THE APP WITH THE FOLLOWING COMMAND:
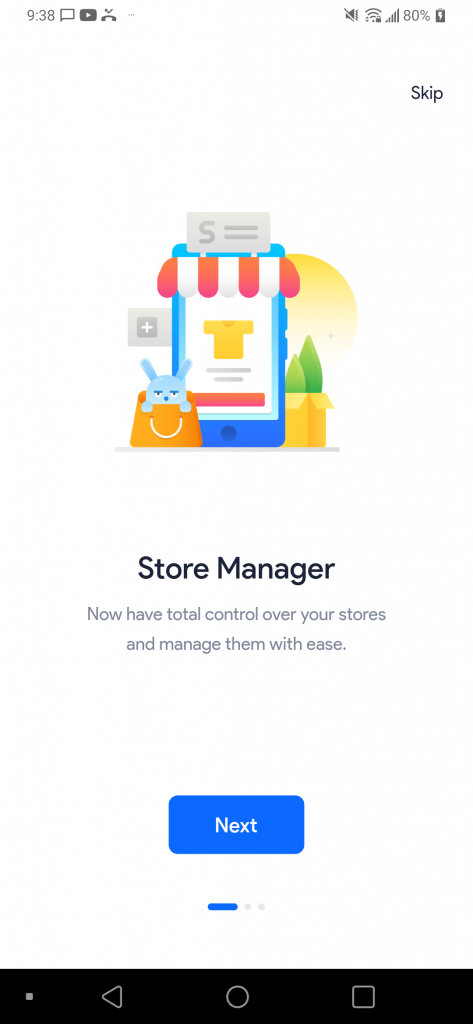
flutter run -d ANDROID_DEVICE_IDANDROID_DEVICE_ID you can see the screenshot below:

After the app build completes, you’ll see the starter app on your device.
Warning Flutter 3
When you running the app and see the issue
Warning: Operand of null-aware operation '!' has type 'SchedulerBinding' which excludes null.These are caused by a simplification of the API (the instance property on bindings is now non-nullable), combined with an eager compiler that wants to report any case where redundant null-aware operators (such as ! and ?.) that are used when they’re not necessary.
It shows up from dependencies used in the project, not from the source code. So you can ignore it when dependencies upgrade we will update the new version and release it later.